|
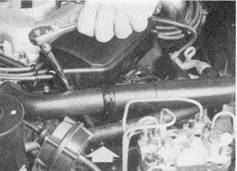
I was successful in
repairing my broken exhaust manifold studs. Below is my exact
procedure I used. I took some video and some pictures, which I will
post also. Half of the time for this procedure will be spent in
removing the components in order to get to the manifold, the other half
involves a delicate procedure for proper extraction of the broken.
My manifold was also warped. I'm not sure if it warped and caused
the stud break or if it warped after the stud broke. Whatever the
case, I had to have it evened out with milling machine. A special
thanks to Matt Blehm, who gave me some excellent points
and direction in this process.
Before starting the procedure, it is almost essential that you
spray the bolts that you can with a �liquid wrench� type lube. I
would suggest making this project a two day project by letting the fluid
soak over night after taking the components off and exposing the
studs.
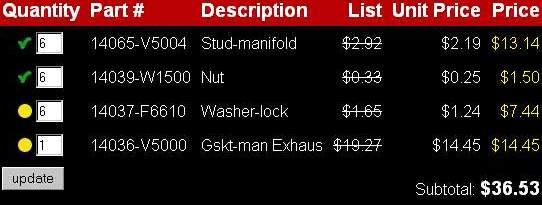
Here are the part numbers that I used. These are the studs from the turbo
VG engine, which are recommended for our application. I got part of
my order for Nissanparts.cc from the Internet. They have the best
prices I have seen. Unfortunately, I had some delay in shipping and
had to go local for my others.
1.
Disconnect the negative terminal on the battery.
2.
Jack the car up and support it properly, locking and blocking
rear wheels.
a.
If you don�t feel you can support it correctly or don�t have the
equipment, take it to a professional.
3.
Remove the two splash shields on each side of the cross member
under the car.
a. 10 mm
bolts.
4.
Remove the elbow leading to the throttle body.
a.
There are a total of three bolts, two on each side and one in the
center that also supports the spark plug wires.
b.
Pull the two rubber tubes going to the elbow.
5.
Disconnect the radiator shroud.
a.
The transmission cooling lines are routed at the bottom of the
shroud. Pull those off.
b.
There are two electrical harnesses, pull those off after labeling
which one is at the top.
c.
There are a total of 5 screws that hold the shroud in, three at the
top and two at the bottom.
6.
Remove the air conditioner belt.
a.
Loosen the nut in the center of the air-conditioning belt idler
pulley. This will allow the belt to loosen when you loosen the
tensioner bolt.
b.
Loosen the air-conditioning belt tensioner bolt, which is a 12 mm
adjuster located above and to the left of the pulley. Loosen
around 15 turns or enough slack to remove it, picture shown.
7.Remove the alternator belt.
a.
See the step-by-step procedure I followed for replacing the
alternator on my alternator page, here.
8.
Remove the alternator. Again, instructions, here.
9.
Remove the air conditioning compressor.
a.
Now that the alternator is removed, you can remove the two lower
air conditioning bolts on the bracket. I suggest loosening all
four of them first.
b.
Get to the top two bolts from under the hood.
c. You will not have to disconnect any hoses.
Just move it out of the way. I brought mine up and rested it on top
of my engine on the left side, without over-stretching any hoses.
10.
Loosen the exhaust gas recirculation copper pipe from the
manifold.
a.
Before pulling this out of the way, try to unscrew the other end of
the copper pipe. I could not get this off. You�ll need a long
wrench for plenty of torque.
b.
I used some considerable force to pull this out of the
manifold. It is flexible material and I had no problems bending
it.
c.
You will need it out of the way in order to drill, particularly on
the cylinder 6 chamber.
11.
Move the oil dipstick tube out of the way by first taking off
the two small bolts that hold it in place.
a.
Again, I bent this tube out of the way, towards the radiator.
12.
Remove the manifold nuts carefully and remove the
manifold.
a.
You may have more studs snap, be slow on un-loosening the nuts.
b.
Scrape away any existing gasket. I used sand paper on both
surfaces to clean them up.
At this point, you�ll want to use a straight edge of some sort in order to determine if
your manifold is warped. Mine was. I�m not sure if the warp
caused the stud to break or if it warped because I drove with it broken
for two months. Probably the latter. I took my manifold to a
machine shop, where they milled the surface with a milling machine so that
it was square again. I�m not sure of the cost because I had mine
done for free. I stood there and watched. It took about 30
minutes.
13. Use
a Center Punch and carefully punch the center of the stud in the
head.
a.
This is an important step. Be sure that when you tap the
punch that it�s dead center.
b.
Alternatively, Matt mentioned a safer but more time consuming
method that can be used, which will ensure a more accurately drilled
hole. This involves taking a broken piece from a stud and drilling
through it on the workbench. Next screw the pre-drilled stud in
partially in the head, where a broken stud exists. Then take a drill
and guide it through the stud that you pre-drilled. This will ensure
a centered hole.
c.
I learned that it is not so imperative that you drill perfectly
into the center of the stud. I was accurate enough to successfully
drill in the centers, except for one. I got into the threads on my
first attempt because of a poor center punch attempt. I ended up
using a simple heli-coil kit, which required a 21/64 drill bit. This
is further explained at the end of this document.
14.
Carefully drill into the studs.
a.
Don�t be concerned with using the biggest bit you can at
first. I used one that was a little less than half the size of the
stud and then worked my way up a couple of sizes before using the EZ
out.
b.
Be sure you are steady with the drill. Do not use too much
pressure.
c.
You�ll be on your back in an awkward position � endurance is
key.
d.
You don�t have to drill in very far. The broken stud is only
about .25 inches long.
15.
After creating a successful hole, spray some solution into it
and get your EZ outs ready.
a.
Use the biggest EZ out you can for the hole you created. The
bigger EZ out you have, the lesser chance of it breaking.
b.
I prefer using the spiral EZ outs, but use whatever you�re
comfortable with.
16.
Carefully tap in your EZ out and then back the stud out, using a wrench or vice grips.
18.
Once you have the studs out, insert the new ones. I
doubled up with two nuts to screw them in the head.
19.
Replace the manifold and all components.
If you drill improperly or
drill into the threads, do not panic. I simply used a heli-coil kit,
which came with individual heli-coils and a tap. I had to supply the
recommended 21/64 drill bit, which I had. After inserting the
heli-coil, the stud screwed perfectly into it. In fact, this stud
felt more secure than the others! I believe I used the 21/64" Drill
for 5/16" Coil Kit, but I think this one would be an exact match: M8x1.25
x 12.0mm, using a 21/64 drill bit. Here�s a picture of a
heli-coil:

I used a friend�s kit, which required only one
heli-coil. I believe a kit will cost about $30.
I hope these steps provide some guidance for you.
If you have any questions, direct them to the BBS.
-----------------------------------------------------------
-->Following, are some
posts from people who did the job.
Posted by John van de Pol ('93 SE 5-speed) on
October 29, 2000 at 20:27:13:
BIG ADVISE. Since this is a big problem, IF you tackle the job,
replace ALL studs. The studs are not torqued in very tight, and by
locking two nuts on them they come out in seconds (at least mine did),
once they break they are an absolute bear to fix. You want to keep
your 3-Gen, it's worth two days (or more) and about $100 in parts (I
replaced the studs and nuts on the Y-pipe side as well) in substantial
prevention. I would have if I had known.
Posted by nismax3 (90 maxima) on October 29,
2000 at 19:29:43:
It really depends on the location of the broken studs.. if they are
front studs you can take out radiator and fix them right up there from
top. However the back studs are hardly even viewable with your car on
a lift. There is virtually no room to put a drill to use an EZ out in
order to remove the broken part of the studs. The easiest way I have
found is to take the engine out from the bottom. It is cheaper and
imho it is easier then removing the head. If you want to go remove the
head it is no that bad of a job but you will need to buy a head gasket
and an intake gasket and a manifold gasket, studs from Nissan are 2
bucks each. You'll need an easy out to take out any broken studs..
generally if you have a noticeable leak there are probably two or
three broken. Sometimes you might get lucky and it just worked its way
out and did not actually break. I decided to pull my motor and
do it that way due to the fact I wouldn't have to spend money on a lot
of gaskets and such. I was able to pull it fix my studs in about 2
days after work. plus it is a lot easier and while you have the motor
out it is a god time to change your timing belt and really clean your
motor and engine bay.
Posted by Dallas (2000 JGC) on October 29, 2000 at
20:28:03:
There is a company "Nickson Industries" who makes a "clamp a stud"
it is used as a permanent solution to repair impossible to get at or
broken manifold studs. It is their part number 500...says it fits 1/4"
to 1-3/4" studs in most imports. Repair shops usually cannot use them
but you should be able to. They have a website and are located in
Plainville, CT. You might call them and find out who they distribute
to in your area.
In the process of drilling out my broken rear exhaust
manifold, drill bit breaks... What now? (Jeremy)
I called Jason Murra, the guy with the ONLY portable EDM machine in
the Bay area. He does this kind of thing all the time and he said as
long as there is at least 6 inches of room, he can EDM the two broken
studs out in about 2 hours. EZ outs are not drillable with carbide,
cobalt, diamond, etc. so I'm not going to waste any more time with this.
His labor rate is less than $100 per hour so I will GLADLY pay him
several hundred dollars to get those %#$@^%! exhaust studs out. Anyway,
he's coming to my house on Saturday the 4th so I'll be down for a while,
but at least I don't have to rip my engine apart. YAHOO! His web site is
http://www.brokenbolt.com
-Jeremy
Posted by Justin Mc (89se 90se (89GXE parts car)) on October 26,
2000 at 10:30:52:
There's something that'll drill through em.. unfortunately those are
$$$ bits.. your best bet is to bite the bullet and pull the head.. take
it to a machine shop give the folks a 20 or 50.. and watch em work..
good luck bro.. sounds like a hell of a pickle your in..
Posted by Brucer (90 GXE) on October 26, 2000 at 11:37:07:
If the EDM can get rid of the broken off eazy-out you've got it made.
Don't worry if the threads are OK. Just drill it out and put in a
heli-coil insert. An insert makes more sense for studs anyway. Because
of galvanic action steel studs are going to weld themselves into the
aluminum head. If you don't use inserts, use anti-size compound on the
new studs.
|