 |
 |
|
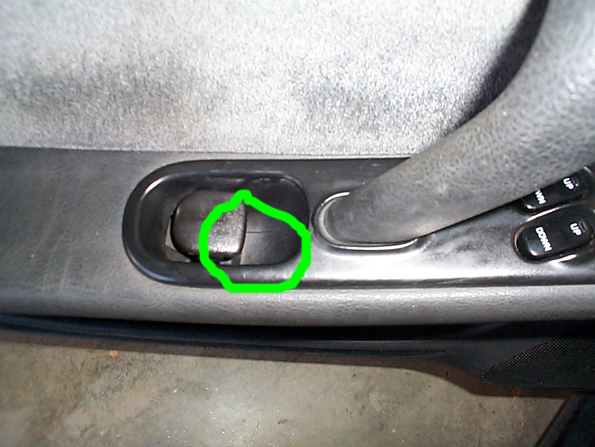
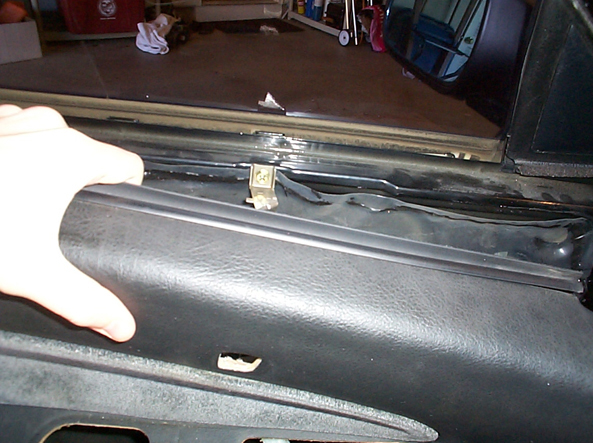
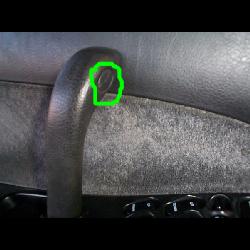
1. These are directions for the driver's side front door. Others will be mostly the same and you can just adapt the directions to work for them. Remove small plastic piece under door handle by using a small flathead screwdriver in the upper part of it where there is a small gap between the pieces and pry out. |
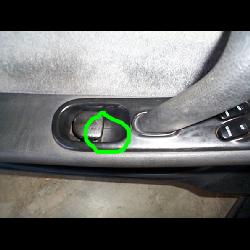
2. Using your fingernail or a small screwdriver, remove the small piece behind the piece in the picture. Behind that is one #3 size phillips head screw. Remove it. |
|
 |
 |
|
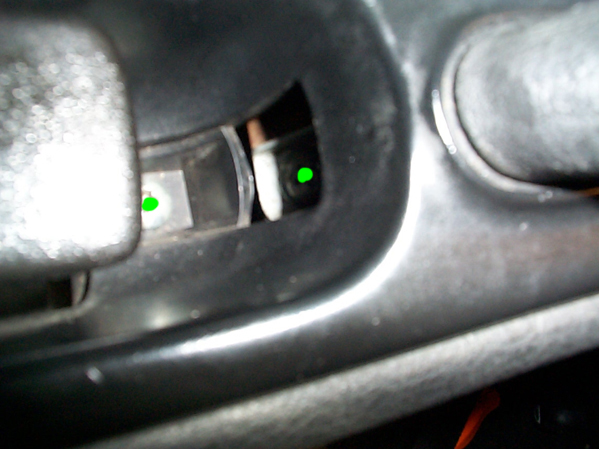
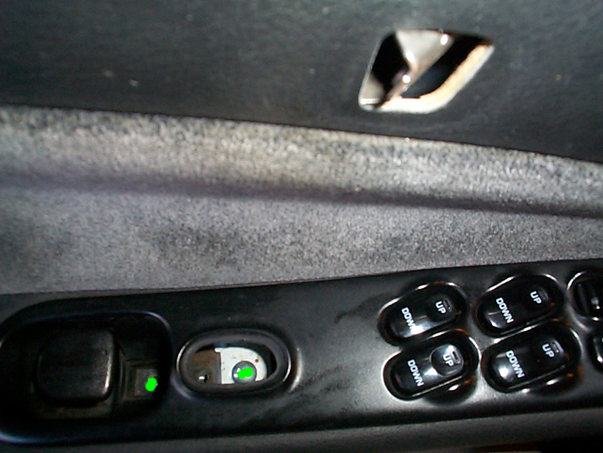
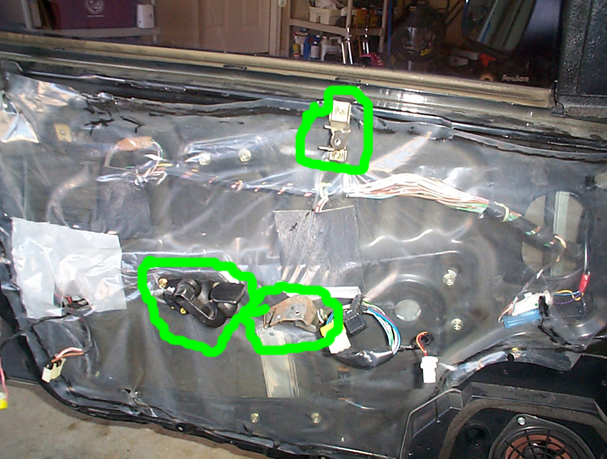
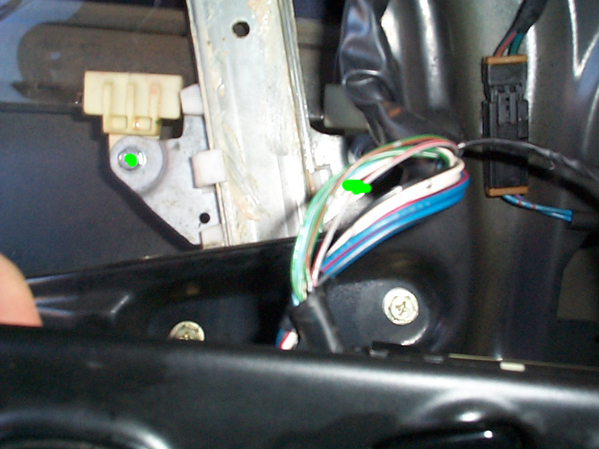
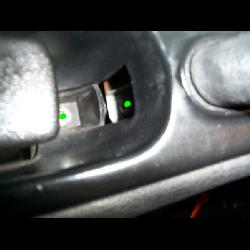
3. Remove the 2 #3 screws marked with the green dots. After removing the one on the right, you will be able to pull out the long handle piece and you will see another screw under that. |
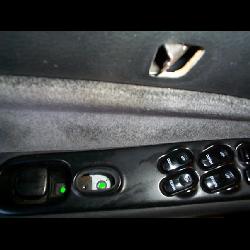
4. Now that the long piece is out of the way, remove the screw under where it was (the green dot in the middle of the pic). The other green dot is where another screw that you already removed would be. After all those screws are up, you can pry up the window control piece by pulling up at both ends. Then, disconnect the wires going to it. |
|
 |
 |
|
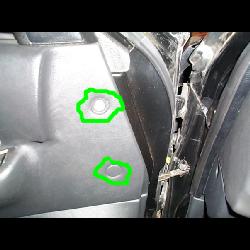
5. Near the base of the doors, there are two small circles that pop off with a flathead screwdriver and take out the screws behind them. This is for front doors only I think. |
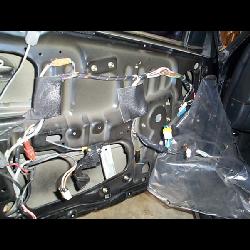
6. Now reach around the sides of the door panel and pull door panel away from the metal part of the door. There are several small fasteners that are around the bottom and sides of the door that just pop out. Once those are done, pull the whole panel up and it should come out. There will be harnesses to the door light and if it's drivers door, the trunk button might be there too. |
|
 |
 |
|
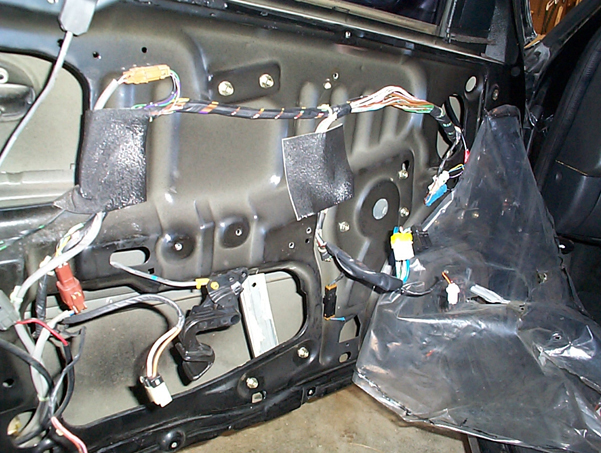
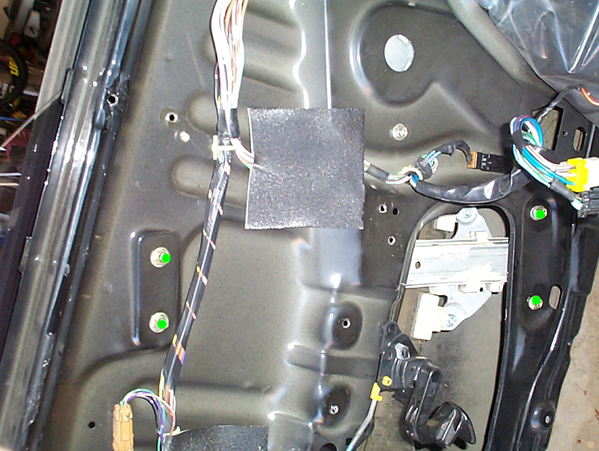
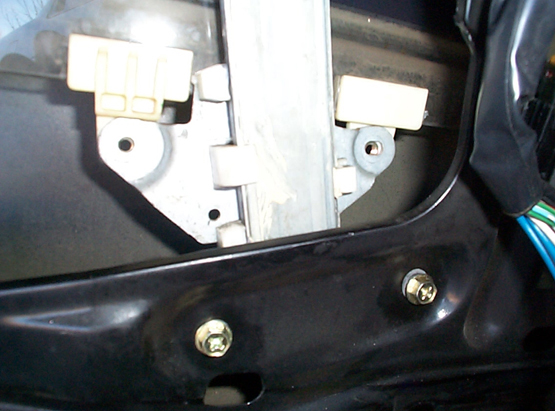
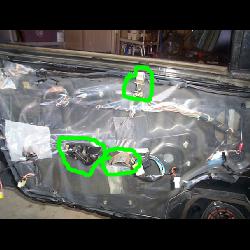
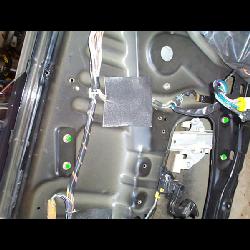
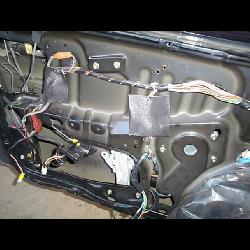
7. Here is the door with the panel removed. You will need to remove the three circled things here which each consist of 2 screws. |
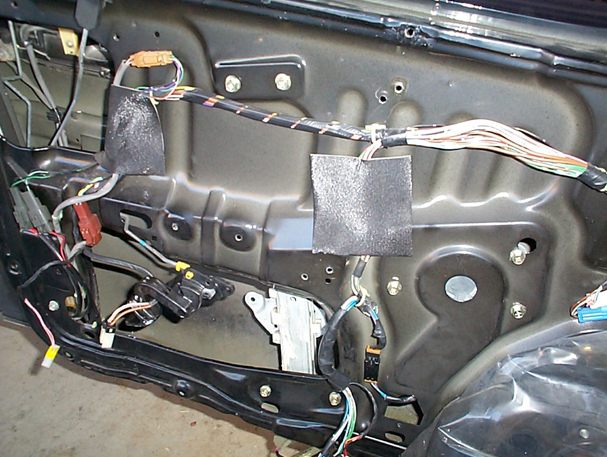
8. After those pieces are off, you can then peel back the plastic cover to get to the inside of the door. There is a kind of adhesive that is at the edges of this, just peel it back and when you put it back on, it will stick again. |
|
 |
 |
|
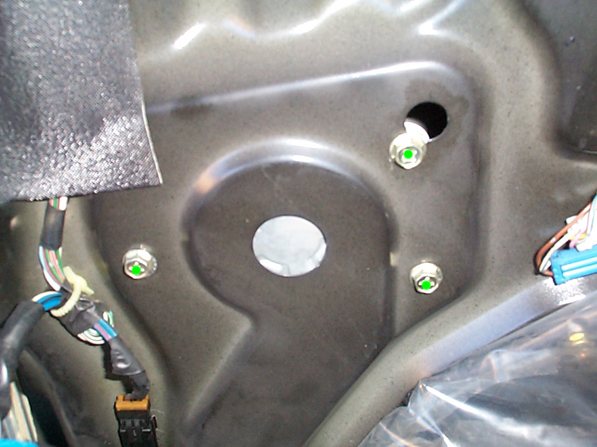
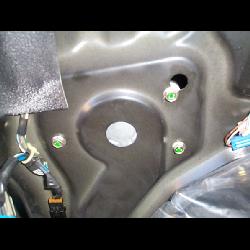
9. Now remove the 3 screws that hold the regulator in. Don't take them all the way out yet, just loosen them so they are almost out. |
10. Roll the window down most of the way if it's not already so that you can see the bottom through the hole in the door and remove the 2 screws that hold the window to the sliding rail. You can just take the window controller and plug it back into its harness without the rest of the door being on to do this. |
|
 |
 |
|
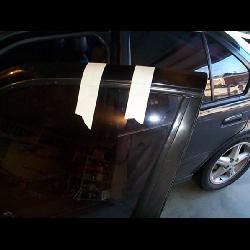
11. Now that window is not attached to rail, secure it at the top of the door. I used masking tape and it worked well. |
12. Loosen 4 screws; 2 at top and 2 at bottom of rail. |
|
 |
 |
|
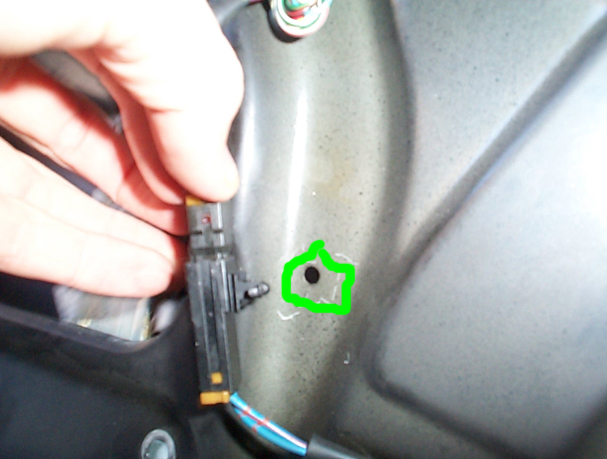
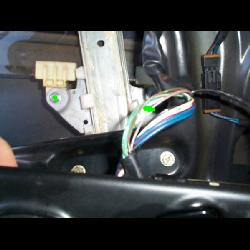
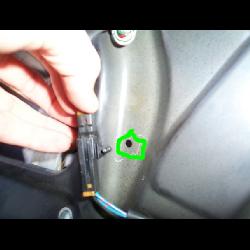
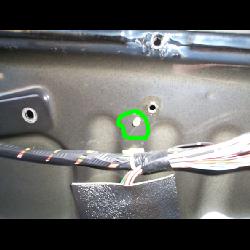
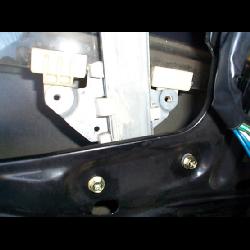
13. There is a small harness near the bottom of the door. Pry this away from the door panel with a flathead screwdriver and then unplug the harness. |
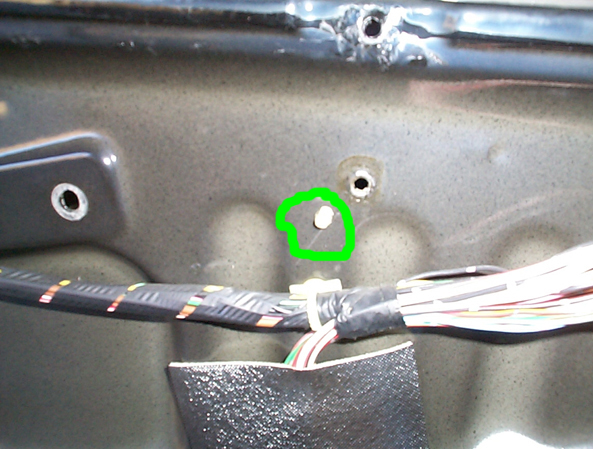
14. Near the top of the door, there is a small, white plastic piece sticking out that needs to be pushed in. Push both sides in while pushing back to get it inside the door. This will be a pain to get back in later, but you have to do it to take out the regulator. |
|
 |
 |
|
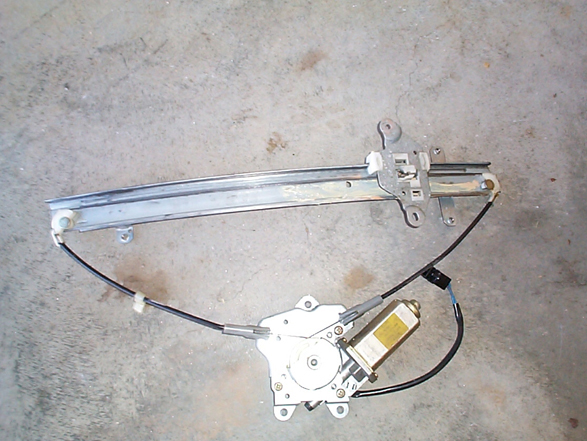
15. Once all that is done, you can now remove all the screws and pull out the regulator with the rail. Just reach your arms in the holes in the door and move the whole thing sideways to pull it out. |
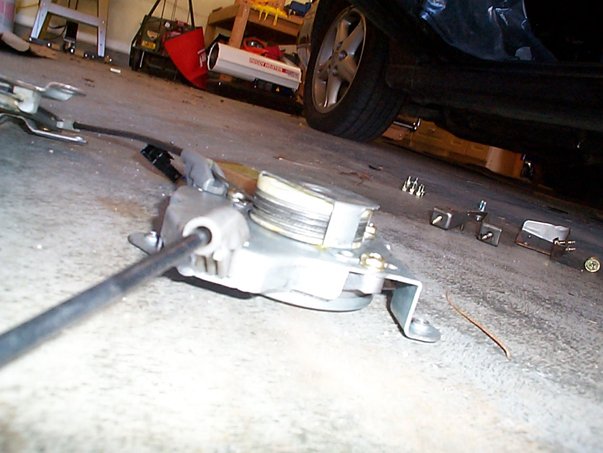
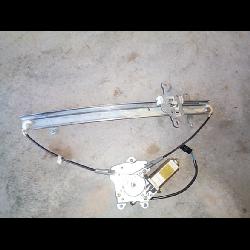
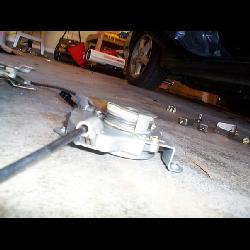
16. If your regulator has gone bad, you're wires will probably be a big mess now. If you bought a new regulator, there are 3 screws that need to be removed to put the new regulator onto the new motor. My window was starting to die so I tried some preventative maintainence by greasing up the wires here. This worked for my passengers side very well, but took a few days for the grease to spread along the whole wire as I used it over that time. Other people (Matt Blehm for example) have used things such as bailing wire to fix the old regulator. |
 |
 |
|
17. Replace regulator the opposite way you took it out. Hand tighten the screws first to make sure everything seats correctly. It is kind of a pain to get all the holes to line up, but just be patient and gentle. |
18. When you put the window back down onto the piece of the rail that slides, make sure the window is in both of it's tracks (front and back of door). |
|
|
19. To reach the small plastic piece at the top, you will have to reach your arm in through the side of the door if it's small enough or through the top with the window all the way down and just push the end through the whole to make it stay. Reach in and get the harness at the bottom too and plug in it and push it back in it's spot. Tighten all screws if window works correctly and just follow the other steps backwards to put door back on. Make sure you put the door panel back on correctly by sliding it in between the window and the metal part of the door. Attach all harnesses too and that should be it. If you have any problems/questions let me know. |